–> Arrows are the new thing right now, and I’ve been seeing them everywhere in every home decorating store. They have become popular in tattoos, jewelry, prints on shirts, and of course… wall hangings. I’m not sure how long the fad will last but I thought, hey, I can do something with this while “it’s cool” – and I’m going to figure out how to do it for less than $10. And then I surprised even myself. I only ended up spending about $5! Woop woop! To be completely honest, I can’t take full credit for this project. I found a photo of an arrow wall hanging made out of popsicle sticks so I zoomed in, printed it, and figured out how to recreate it. That’s right, folks. Popsicle sticks. And I am loving it!!
–> This is all that you need:
- 47 wide popsicle sticks
- A brown or gold acrylic paint (& paintbrush)
- Hot glue gun
- Picture hanging strips (or double sided foam tape, etc.)
The most expensive part of this arrow craft is the popsicle sticks. How cool is that!? Everything else I had on hand!
–> Step 1) Paint one side of each popsicle stick the brown or gold color.
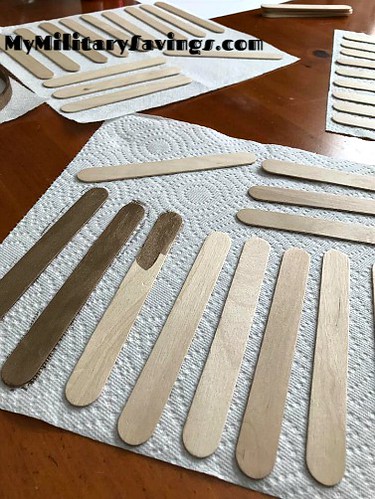
–> Step 2) Once each stick is painted and dried, arrange 9 sticks into the shape of 3 triangles and hot glue together. Then arrange sticks into 9 “V” shapes and glue together, as shown in the photo below.

–> Step 3) Begin putting the base of each arrow together. You will use a V shape (okay, it’s an upside down V) and hot glue 2 sticks to the outer edges to form a “W” (see photo 1 below). Then attach another V shape to the top of those outer edges (see photo 2 below).

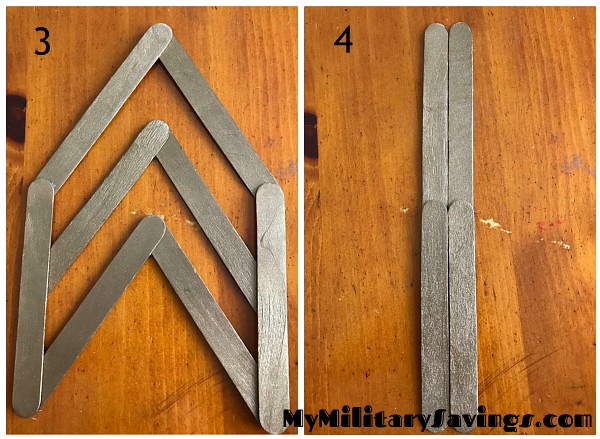
–> Step 4) Now you’ll take one more V shape and glue it in the middle of the 2 points (see photo 3 below). The bottom of your arrow is now complete – repeat this twice more to make 3 arrows. With the remaining popsicle sticks you will glue them together in 2s to form a long stick that will connect the head of the arrow with the tail. For 2 of the arrows I used two sets of 2 (see photo 4 below) and with the 3rd arrow I used three sets of 2 to make it a little longer.
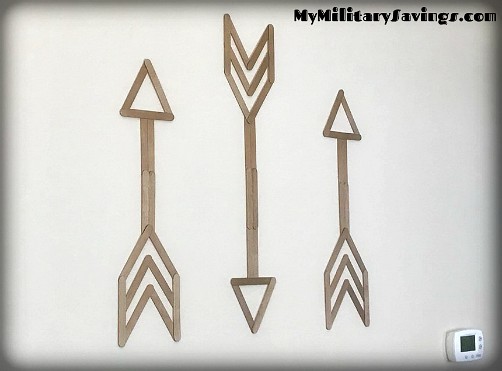
–> Step 5) Finally, attach the triangles to the top of each arrow. Now they’re ready to hang!!

I put the two shorter arrows on each side and the longer arrow in the middle pointing in the opposite direction. This is exactly what I needed to complete my upstairs hallway!!

I think these would also be perfect for a gallery wall, with photo frames and other odds and ends placed all around them.
So whadaya think? Is this doable or what!? I’d love to see your creations if you give this a shot! Post those comments below!
For more fun crafts and DIY projects, subscribe to MyMilitarySavings.com!!