This summer I’ve been enjoying trying my hand at diy projects that are a bit out of my comfort zone.
Dip dyed shoes were no exception!
Never in a million years did I ever think I would dye my own shoes. But boy am I glad I did! At least once I got over my nervousness. Cause you know… Dye… It’s permanent… And messy…. And did I say permanent! Plus I have children in the house who seem to flock and hover to anything that can be messy and disastrous like seagulls looking for food!
So many things can go wrong… But once I got over that and accepted that they won’t be “perfect” and will probably come out different than I was envisioning in my head I was on board to at least try!
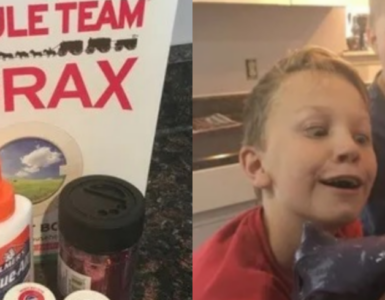
To start you will need…
http://i36.photobucket.com/albums/e25/dlarkin33/2_zps9oinuo0t.jpg
- Pair of white shoes
- Bucket/glass bowl/metal bowl
- Fabric dye.
- Salt.
- Hot water.
- Gloves.
- Table protection (I used a trash bag) .
This project only costs me $11 for the shoes and dye! Not bad at all! To start you need to un lace your shoes. If they are brand new shoes and came with a plastic hanger, KEEP IT! Next run the shoes under cool water getting them completely wet, but not soaking wet. This helps the fabric absorb the dye better. Set the shoes to the side. To make your dye follow the directions on the back. Mine asked for only hot water and salt.
http://i36.photobucket.com/albums/e25/dlarkin33/3_zps7td0ha5m.jpg
Once mixed (I chose to use a smaller bowl than called for to concentrate the color more) your ready to go! Make sure your entire work area is covered and that you wear gloves! I started with dipping the toe in and holding for a few mins, then slowly lowering it more creating an ombre effect.
http://i36.photobucket.com/albums/e25/dlarkin33/1_zps5mpprkda.jpg
Keep dipping and holding until your satisfied with the color.
http://i36.photobucket.com/albums/e25/dlarkin33/4_zpsooaf4owk.jpg
I chose to also do the back of the shoe. Once done with the dye, run the shoes under cool water rinsing until the water runs clear. Now remember that plastic piece I said to keep… Use that to hang your shoes until dry.
http://i36.photobucket.com/albums/e25/dlarkin33/5_zpsjcgf9n2w.jpg
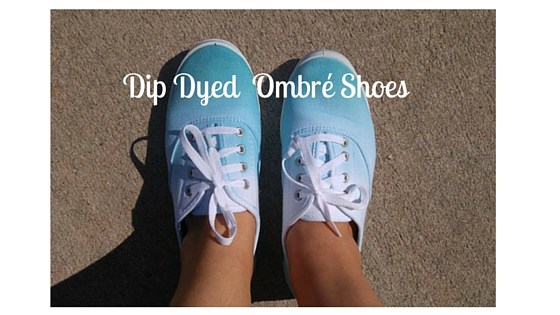
It was a hot and sunny day so outside they went! After a few hours, they were completely dry and laced up and ready to rock! I’m definitely glad I decided to make these. They are one of a kind and personal!
http://i36.photobucket.com/albums/e25/dlarkin33/6_zpsadwl5xwg.jpg
They are also a wonderful POP of color in my summer wardrobe!
If you’ve ever dyed shoes how did it turn out for you? And if you could have dyed shoes what color would you pick?
Let us know in the comments!
MyMilitarySavings.com was not compensated by the company, service or product mentioned in
this blog. This is strictly the honest opinions, findings, beliefs, and/or experiences of the author.
The views and opinions expressed in this blog are purely the bloggers’ own. Any claims,
statistic, quotes or other representation about a product or service should be verified with the
manufacturer, provider or party in question. MyMilitarySavings.com is not liable for any risks
injury or illness that may occur if you choose to act upon the bloggers’ suggestions stated in this
blog.