Alright, alright!! Pumpkin spice is in the air… and fall is around the corner!! My summer flowers are dying and there’s scarecrows and cinnamon stick wreaths in stores everywhere – telltale signs that we are entering the beautiful autumn season. 🍂 🍁 🍃 Summer was a blast but I am finally ready to embrace the cooler months ahead. Plus, my scarves and boots are dying to be pulled out from the back of the closet!
So it’s out with the old and in with the new now! My flip-flop wreath has come down and I’m putting out my orange and red mums. I’m not quite ready to go all out with Halloween decorations yet, although it’s a battle every trip to Wal-Mart because my kiddos see it all on display front and center and they don’t understand why we can’t start planting spider webs in our living room TODAY. Sigh. Soon enough I tell them, soon enough!
I AM, however, pulling out my cozy apple pie scented candles, our candy-corn colored fabric banners, and dried corn stalks. As I was sorting through everything I realized that I needed new autumn themed centerpieces for my dining room table and living room so I began brainstorming ways to decorate that I haven’t tried yet and it instantly hit me – a craft that I have been wanting to try for soooooo long but never had a need for it. Well folks, it’s the perfect time now!!! BLEACHED PINECONES!!!
I love the woody, au natural, repurposed adornments around the house so this DIY was right up my alley and it really makes a fantastic embellishment for console tables, mantelpieces, countertops, you name it. Once you read how easy it is to do, you’ll have jars of these things all over the place, too! 🙂
This is all you need:
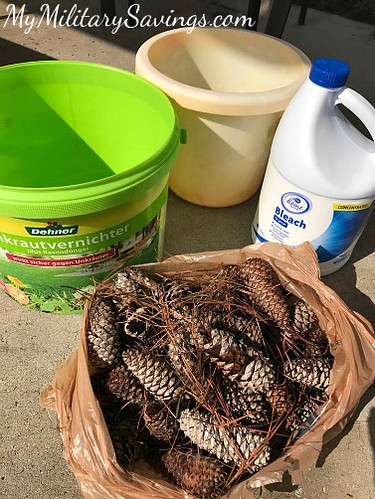
- Pinecones (open or closed, it doesn’t matter)
- Bleach
- Water
- A large bucket
- Another large bucket to fit inside of the other one OR heavy items such as bricks or large rocks
Step 1) Place pine cones into a large bucket. Fill the bucket with water so it covers the pine cones and then add 1 part bleach to 2 parts water. I eyeballed this – it does not have to be exact. You just want to make sure the bleach is diluted about 2:1 so the pine cones won’t disintegrate and fall apart.
*I, of course, recommend doing all of this outside in a well ventilated area, and using gloves to protect your skin!

Step 2) Depending on what you decided to use, cover the pine cone and water/bleach mixture to force the pine cones down so they’re completely covered. They will want to float so you need bricks, large rocks, or another bucket full of water to submerge them. I chose to use a bucket 1/2 full with water. You don’t want to crush the pine cones, but force them down. You get the point.

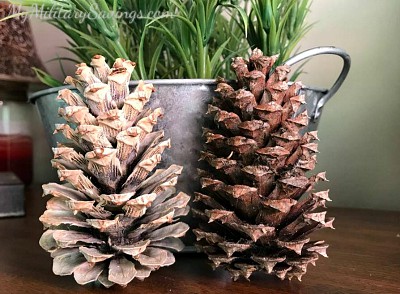
Step 3) Let the pine cones soak for 24 hours and then remove from the bleach water. You will notice that they all closed up because they were wet… no problem. Set them in the sun for a few hours to dry and you will find that they all reopen. This will also remove any unpleasant smell.
Step 4) Decorate with them as you wish!

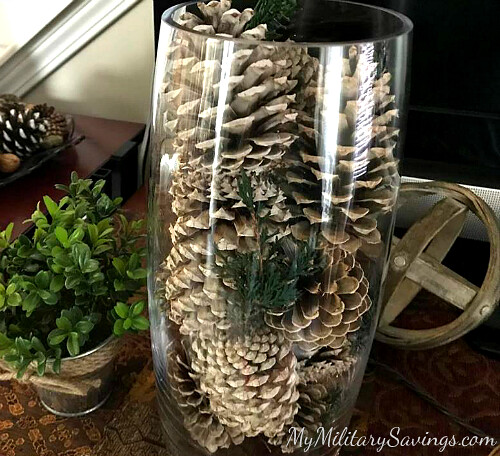
I am all about simple, and I am all about CHEAP! This project cost me absolutely nothing because I already had bleach on hand. And it’s a fabulous look for the upcoming fall season!
Let me know what you think!! Give it a try, and tell me how it turns out! I’d love to see photos in the comments below!
For more frugal DIY ideas, subscribe to MyMilitarySavings.com!