There’s something so cool about those lollipops… they’re beautiful crystals formed out of sugar that make a very appealing piece of candy. We buy them on special occasions when we make a trip to our historic candy shop, Savannah Sweets. My daughters always look forward to bringing some home and sometimes won’t eat them right away because they want to “make them last.” I figured that we had to start creating our own, and then we could eat them and make them again… and again… and again! But it wasn’t until my oldest kiddo started a project at school growing her own crystals with salt and a string (and she came home ranting and raving about how awesome the science was behind it) that my wheels started turning and I decided that this was the perfect opportunity to make a teaching moment out of something delicious – our homemade rock candy!! Plus I was kinda thinking if her teacher could grow salt crystals on a string then there’s no way I could mess up sugar on a stick, right? Well, errr, sorda. And that’s why I’m here to explain the process to you today!
This is a seriously fun project to involve your children with (and there’s plenty of reward to reap, as well!) I’ll explain the science behind it as we go.
This is what you need to get started!
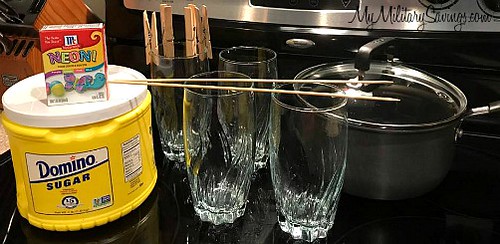
- 1 cup of water (per each rock candy lollipop you want to make)
- 2 cups of sugar (per each rock candy lollipop you want to make)
- Food coloring (optional)
- Skewers
- Glasses
- Clothes Pins
- Sauce pan
*Note: I researched this experiment a lot prior to doing it myself and found that everyone suggested using a 3:1 sugar to water ratio. I disagree. Through our trial and error, I learned that 2:1 worked best for us. In fact, out of the 4 lollipops that we initially tried to grow, the only successful one was the 2:1 ratio. I will explain it a bit more in a few steps.
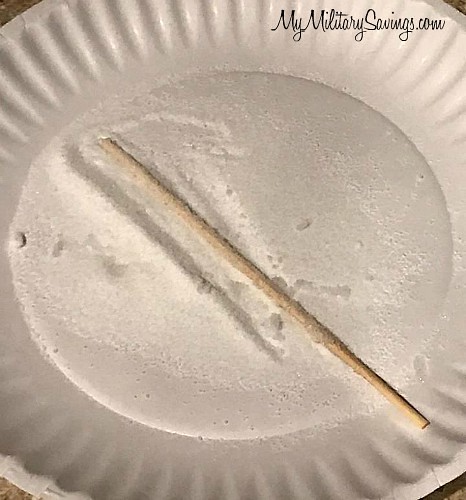
Step 1) You will need a skewer for each rock candy you plan on making. Dip the skewer in water and roll it in granulated sugar and let dry. This is very important that the sugar dries completely or else it will rinse off as soon as you put it into your sugar solution. The sugar coating on the stick is what initiates the crystal growing process.
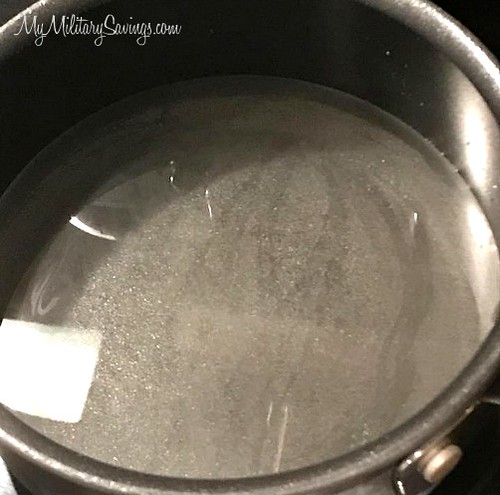
Step 2) Boil 1 cup of water. Over medium heat add 2 cups of sugar, using 1/4 of a cup at a time, and stir well between each addition. You are wanting your end solution of sugar water to be cloudy and you can still see the grains of some of the sugar. This is a saturated sugar solution in which no more sugar can dissolve in the amount of water at a particular temperature.
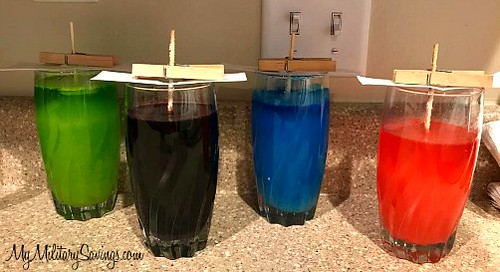
As I stated, I went through a little trial and error here. Per other websites I had found, it was suggested to use up to 3 cups of sugar for 1 cup of water so I played with our ratios a bit. In our green glass I used 2 1/4 cup of sugar, the blue glass was 3 cups, and the pink glass was 2 1/2 cups of sugar. However, the only successful rock candy was the purple glass with 2 cups of sugar!! This is the trick, people!
Once your sugar is added, remove the saucepan from heat and set aside to cool. It is now that you can add food coloring if desired. I used 10-11 drops per cup to create a vivid color HOWEVER I realized afterwards that such a dark color prevented us from being able to watch the crystals grow (hey, trial and error, right!?) I suggest using a very light tint of color for this reason.
Step 3) After the sugar solution has cooled for 15 minutes or so, pour it into a glass. Pinch each skewer with a clothes pin and set the pin across the top of the glass to prevent the skewer from falling in. It is very important that the skewer not touch the sides or bottom of the glass! The mouths of our glasses were a bit large so you can see that I improvised with a piece of paper for additional support to make sure our labors would actually bear fruit. 🙂 You will now set these glasses aside to cool completely and do not touch or move the skewers for at least 5-7 days!
So how does this process work? Well, remember you created a saturated solution once you had more sugar in the water than would dissolve, right? Once that saturated solution cools is becomes a supersaturated solution. This is an unstable solution because it contains more solute (sugar) than can remain in liquid form so the sugar pushes out of the solution forming a precipitate (crystal). As time passes some water will evaporate leaving an even more saturated solution so more crystals continue to grow and grow.
The photo below is just to demonstrate that indeed 3 cups of sugar to 1 cup of water is entirely too much. In red, I outlined the mass of sugar that was just clumping at the bottom of our glass because it was too supersaturated. The end result was a skewer that I could not even remove from the glass because the crystals actually formed a mountain on the bottom and up the sides of the glass making one solid clump. Not a very pretty rock candy lollipop, I tell ya.
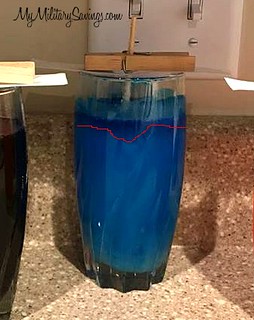
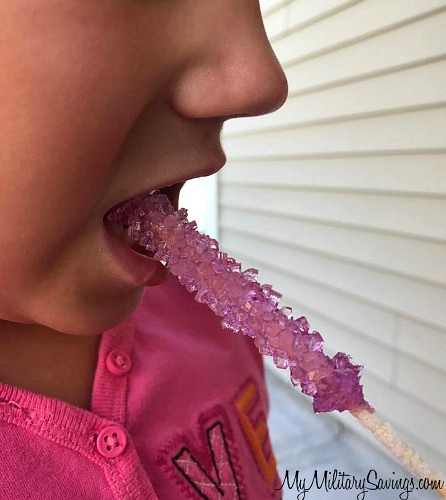
So this was our one baby that made it out alright. Lucky purple! (My youngest munchkin’s favorite color… this month.) The photo below shows the sugar crystal growth after 5 days. The longer you leave it to sit, the larger it will grow!


I hope you will give this activity/experiment/fun family project a shot! Now that we have the hang of it, this is a monthly requirement in our household. We sure go through a lot of sugar… but the fun is really worth it.
Let me know what you think!!
Check out MyMilitarySavings.com for more fun family activities and crafts!!