Yeah, that’s my Bruno Baby. <3 How handsome is he!? I have two fur children but Bruno was my first and is dearest to my heart. I guess you can say he is somewhat of a therapy cat… The locals here in NY refer to this thing called “seasonal depression” because of poor weather over half of the year long but I fell in a slump that was surely longer than one season. But when I had no one to talk to and was deprived of Vitamin D because of the rain, snow, and cold… Bruno was my right hand man! We call him a cat-dog, actually, because I think at times he feels he may be a canine. He drinks out of the toilet, runs to the door when someone knocks, and digs through my trash! But I love that four legged fur ball to absolute pieces.
So the month of January tends to hold the “New Year, New Me” trend, right? I could not vow to make any abrupt changes to myself or lifestyle (I’m still on the fence about the purple mermaid hair… hmm…) but I could surely influence my fur babies to get a makeover! In fact, once I brought the materials home that I needed to make my little guys look so fancy dancy they went crazy and were rolling around in my shopping bags and meowing. A total sign that they were ecstatic about this project. 🙂
No, but seriously, they do love these awesome DIY Cat Collars that cost me less than $5 for BOTH OF THEM! They’re handsome and they know it!
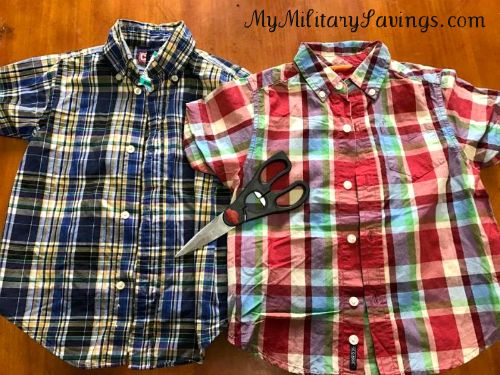
The only real effort this DIY takes is scouting out your local thrift store. Unless you happen to have toddler button-up shirts on hand! That’s what you’ll be looking for… not necessarily a collared shirt but a button-up collared shirt because the material tends to be a bit different. You don’t want a knitted cloth but a woven cloth that won’t unravel once it is cut. The size of the shirt depends on your feline friend. My Bruno is a little over one year old and weighs 13 pounds and a 24 month shirt fits him perfectly. If your cat is more petite I would suggest a 12 month/18 month shirt. It is very important, obviously, that you don’t choke your cat and that this collar doesn’t make them uncomfortable or distressed so try the sizes on them before making this project. (Side note: My shirts only cost $2 a piece!! SCORE!)
Once you’ve found the perfect shirts for your kitties, grab a pair of scissors and an iron.

The only part of the shirt you’re going to be interested in is the actual collar. Unfold the collars and iron them so they are nice and flat and crisp.

Next you are going to cut right under the seem that holds the very first button of the shirt.

So you’ll end up with this:

Now simply button it around your cat’s neck and voilà!

That’s Bruno and Gus Gus, both named after Cinderella because I have two daughters so no further explanation necessary. I can’t get over how nice they look in their new attire!!
They also take their bird watching jobs much more seriously now that they’re professionally dressed.

If you give this a try (because it’s impossible to not want to after seeing how easy it really is, right?) then I would LOVE to see your finished products on your fur children! Share those photos in the comments below!!
For more crafty, clever, DIY projects or fun, family friendly, arts and crafts… visit MyMilitarySavings.com!


