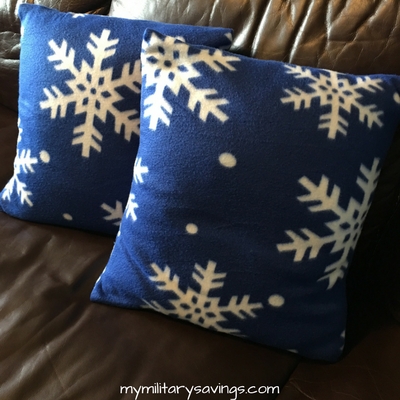
These Wintry DIY Pillow Covers craft is inexpensive and PERFECT for beginner sewers. Truth be told, pillow covers are my favorite thing to make. All my couch pillows (6!) have custom covers on them. They’re cheap and super easy to change out with my living room colors.
I’ve been using a 3 piece envelope pattern for my pillow covers for the longest time, but when I saw Happiness is Homemade post a tutorial on an even easier pattern, I knew I had to try it! Guess what? It IS easier! Now, I want to go through my linen closet and make pillow covers out of all my old blankets and throws. HA! These would make GREAT gifts as well! Let’s get to it!
Materials Needed:
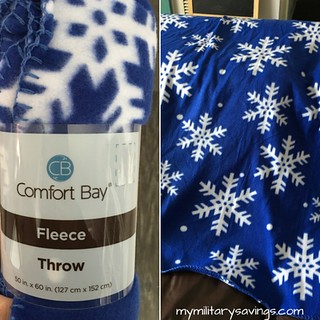
- Inexpensive fleece blanket, I found mine at the dollar store! It measured 50″x60″
- Sewing machine with thread, the color thread won’t matter
- Any pillows that need a new cover! 😉
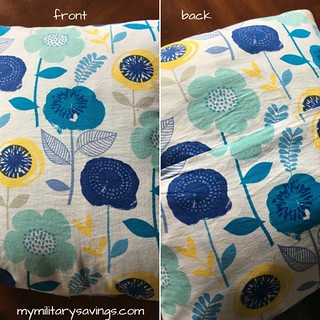
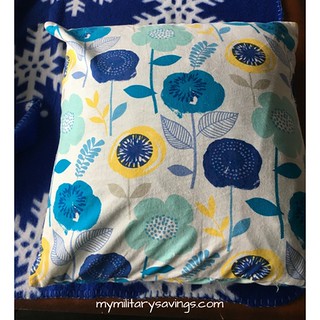
I started by washing and drying my fleece throw. Fleece is an EXCELLENT material to start with, because it doesn’t fray when you cut it. It’s also stretchy and very forgiving. Below is a picture of the pillows I chose to cover. The flower material is actually a cover I made earlier this year! As you can see, the back has an open flap like a fold down envelope. We’ll be doing the same with the blanket.
I kept it SUPER simple. Lay your blanket out and measure the width of your pillow. Standard pillows are usually 17″x17″. I measured 17″ wide because I like a fitted cover and I knew the fleece would stretch around the pillow nicely. Cut the length of the blanket.
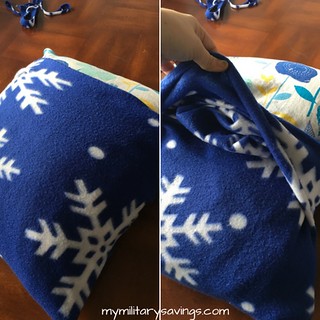
For a visual, below is how the envelope system folds around the pillow. Because the blanket is hemmed, there’s only TWO sewing steps in the whole project. You want to make sure the pillow will slide into the bottom pocket and the top flap will cover it. The two sides will be sewn together so there will be some stuffing of the pillow into the cover going on. I’ll walk to you through it though!
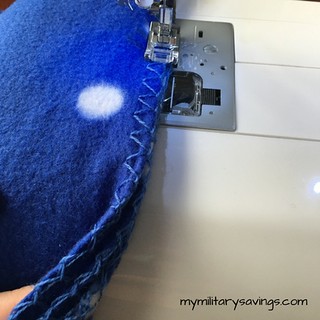
Confession, I am a lazy seamstress. You can absolutely pin each side down to make absolutely sure everything is even. If I can get away with not pinning anything, well, that’s my type of project! 😉 Sew down the length of both sides. The majority of it will be 3 pieces of material since you’ve folded the fleece into thirds.
Now you’re almost done already! This is what it looks like with both sides sewn. Another great thing I love about these fleece blankets, is the design is the same on both sides, so you don’t have to worry about pieces the “right” sides together.
Flip your cover inside out so the sewn sides are inside. This was probably the hardest part for me! Simply reach inside and grab two corners and flip it, then grab the other two and flip the other half. Whew!
Now it’s time to stuff that pillow inside! This can be a little tricky too, but we’ll get there. I had to lift the envelop flap almost inside out to tuck my pillow into the bottom pocket. Then, you’ll reach back around and pull the flap down.
This is what the back of your pillow should look like! The envelope flap is the hemmed part of the blanket and it’s so darn cute! I love that these covers are so versatile and easily interchangeable! You can make them for every holiday and season!
I must admit, they turned out even better than I anticipated!! I am in LOVE with these soft, warm holiday pillows.
I hope you give these easy-peasy pillow covers a try today! The $5 blanket I bought was so large, I may go squeeze in one or two more covers!
For more DIY tutorials and great recipes, check out mymilitarysavings.com. Membership is free so be sure to sign up today!

