I am a huge fan of old, weathered, distressed wood furniture and with my husband’s permission (thank goodness!) I am slowly redecorating our home, room by room. Think a primitive country style, if you will. If you watch Fixer Upper with Chip and Joanna Gaines… they are my idols. ANNND I heard that Joanna is bringing a line of her home decor to some stores near you!! I’m not positive on the truth behind that or not but can I just say, we are going to go absolutely broke if that is indeed correct. Take my money, Joanna, take it alllll!
I’m totally kidding. I am such a frugal person that I’d rather labor day and night to recreate something I saw in a store. Plus, it feels really good to look at something you made and think, “Yep. I did that!” So the BEST DIY projects I have found are the ones that don’t take forever to put together and that are actually fairly simple but look amazing. Such as… this Americana star for your outdoor living space! Or it would even be a fantastic piece to place over a fireplace, too! And it cost me $3 (for a box of screws) and took less than 2 hours. SCORE! My favorite thing about it is that I was able to repurpose an old beat up pallet that was destined for the trash and turn it into something I am proud to display.
Make an afternoon project out of this! This is all that you’ll need:
- an old pallet, separated
- screws (I used 1 and 5/8th inch)
- white paint
Step 1) Break your pallet down into pieces. You’ll need 5 slats of wood to create the star. I didn’t mind that some pieces were splitting or broken at the edges – it adds to the old and weathered effect!

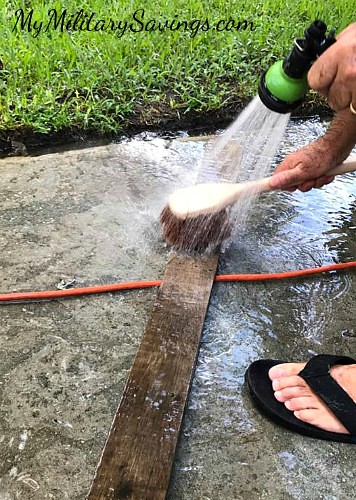
Step 2) If dirty, give your slats a little scrub. You can assemble the star while it is wet but will have to wait for it to dry to paint it.
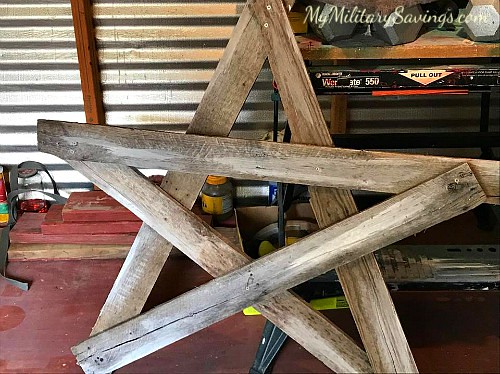
Step 3) Arrange the star the way you like it on the ground and assemble it section by section. I chose screws instead of nails because it was easiest with my electric drill, but nails would work fine, too. Typically people choose nails over screws to prevent the wood from splitting but in this case, it doesn’t matter! Some splitting adds character. 🙂
Every end piece that you are connecting together will lay nicely on top of each other, but there will be some gaps throughout the middle of the star where pieces cross over each other but will not lay flush on top of one another. This is fine. You can fill in the gaps with small chunks of wood or leave the gaps as is.

Step 4) With white paint, use a dry brush to spread the paint over random sections of the wood, without covering it all. There should be more bare wood visible than white paint when you are done. Imagine that this star was completely white 50 years ago and had been left outside on the side of some barn, forgotten about. The way you would find it after all of those years is the way that you want this thing to look now! After I wiped a few strokes of white paint over each wooden slat, I took a chain and smacked the wood a few times to put little ding marks into it. Totally optional there but I would recommend it if you’re feeling a little frustrated. Haha.

Step 5) Step back and observe! Notice I didn’t bother sanding the slats or anything – it’s completely raw wood with a lot of natural beauty.
Then place it for everyone to admire!

Easy, right!? The hardest part is probably locating an old pallet if you haven’t had anything delivered to your house on one (like sodding or a new AC unit… whatever.) They happen to be building a new donut shop in our town and let me ransack their pallet piles by the dumpster!
My next pallet project was a gorgeous shelf that I hung by my front door – stay tuned for my blog on how to DIY!
And now, I am working on a pallet bookshelf…

It’s a beauty, huh? And costs next to nothing – compare that to some furniture stores!!!
I’d love to hear any feedback from you! Leave me a comment below, and send photos of any of your repurposed pallet work!
For more DIY projects, follow me at MyMilitarySavings.com!