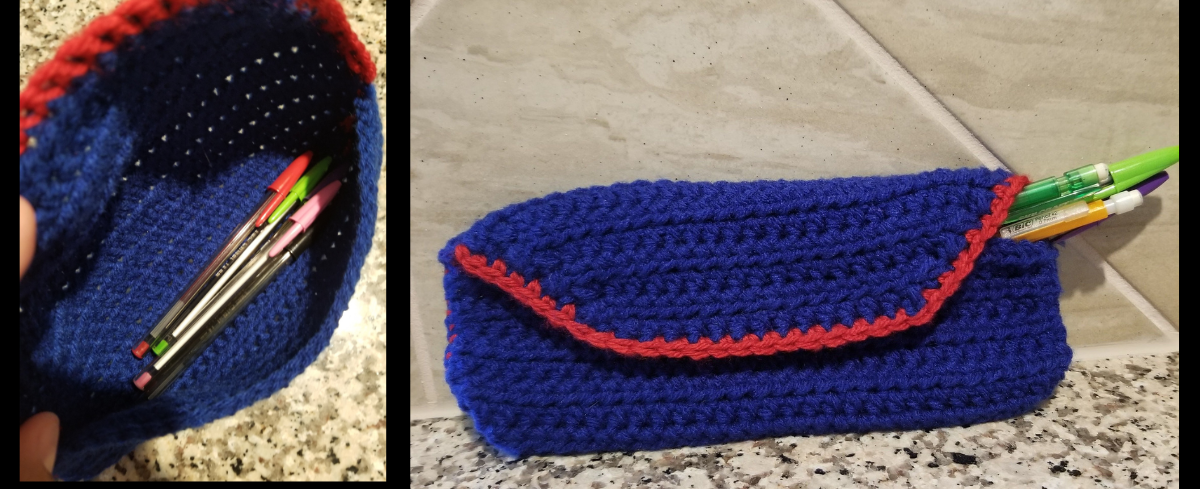
Back to school time is almost here, can you believe it?? This summer has flown by for us and we are already looking at buying school supplies. Between pencils, pens, notebooks, and folders, the price of things can really add up. As a teacher, I noticed that many school supply items look similar and if no name is written, they can often get mixed up with other children’s items. So, I wanted to make something that was somewhat cost worthy and different. I made a super cute pencil pouch that can hold anything from pencils, pens, markers, crayons, erasers, and everything in between. You could even make multiples to keep different types of items, for example, one for pencils/pens and one for markers. And guess what, it is super simple too!
Supplies:
- Size H crochet hook
- Medium (4) yarn in any color or multiple colors
- Scissors
- Needle
- Button (optional)
Terms:
- Chain = the stitch used to increase the height for new rows or rounds
- HDC = Half Double Crochet
- SC = Single Crochet (most basic crochet stitch for designs)
Directions:
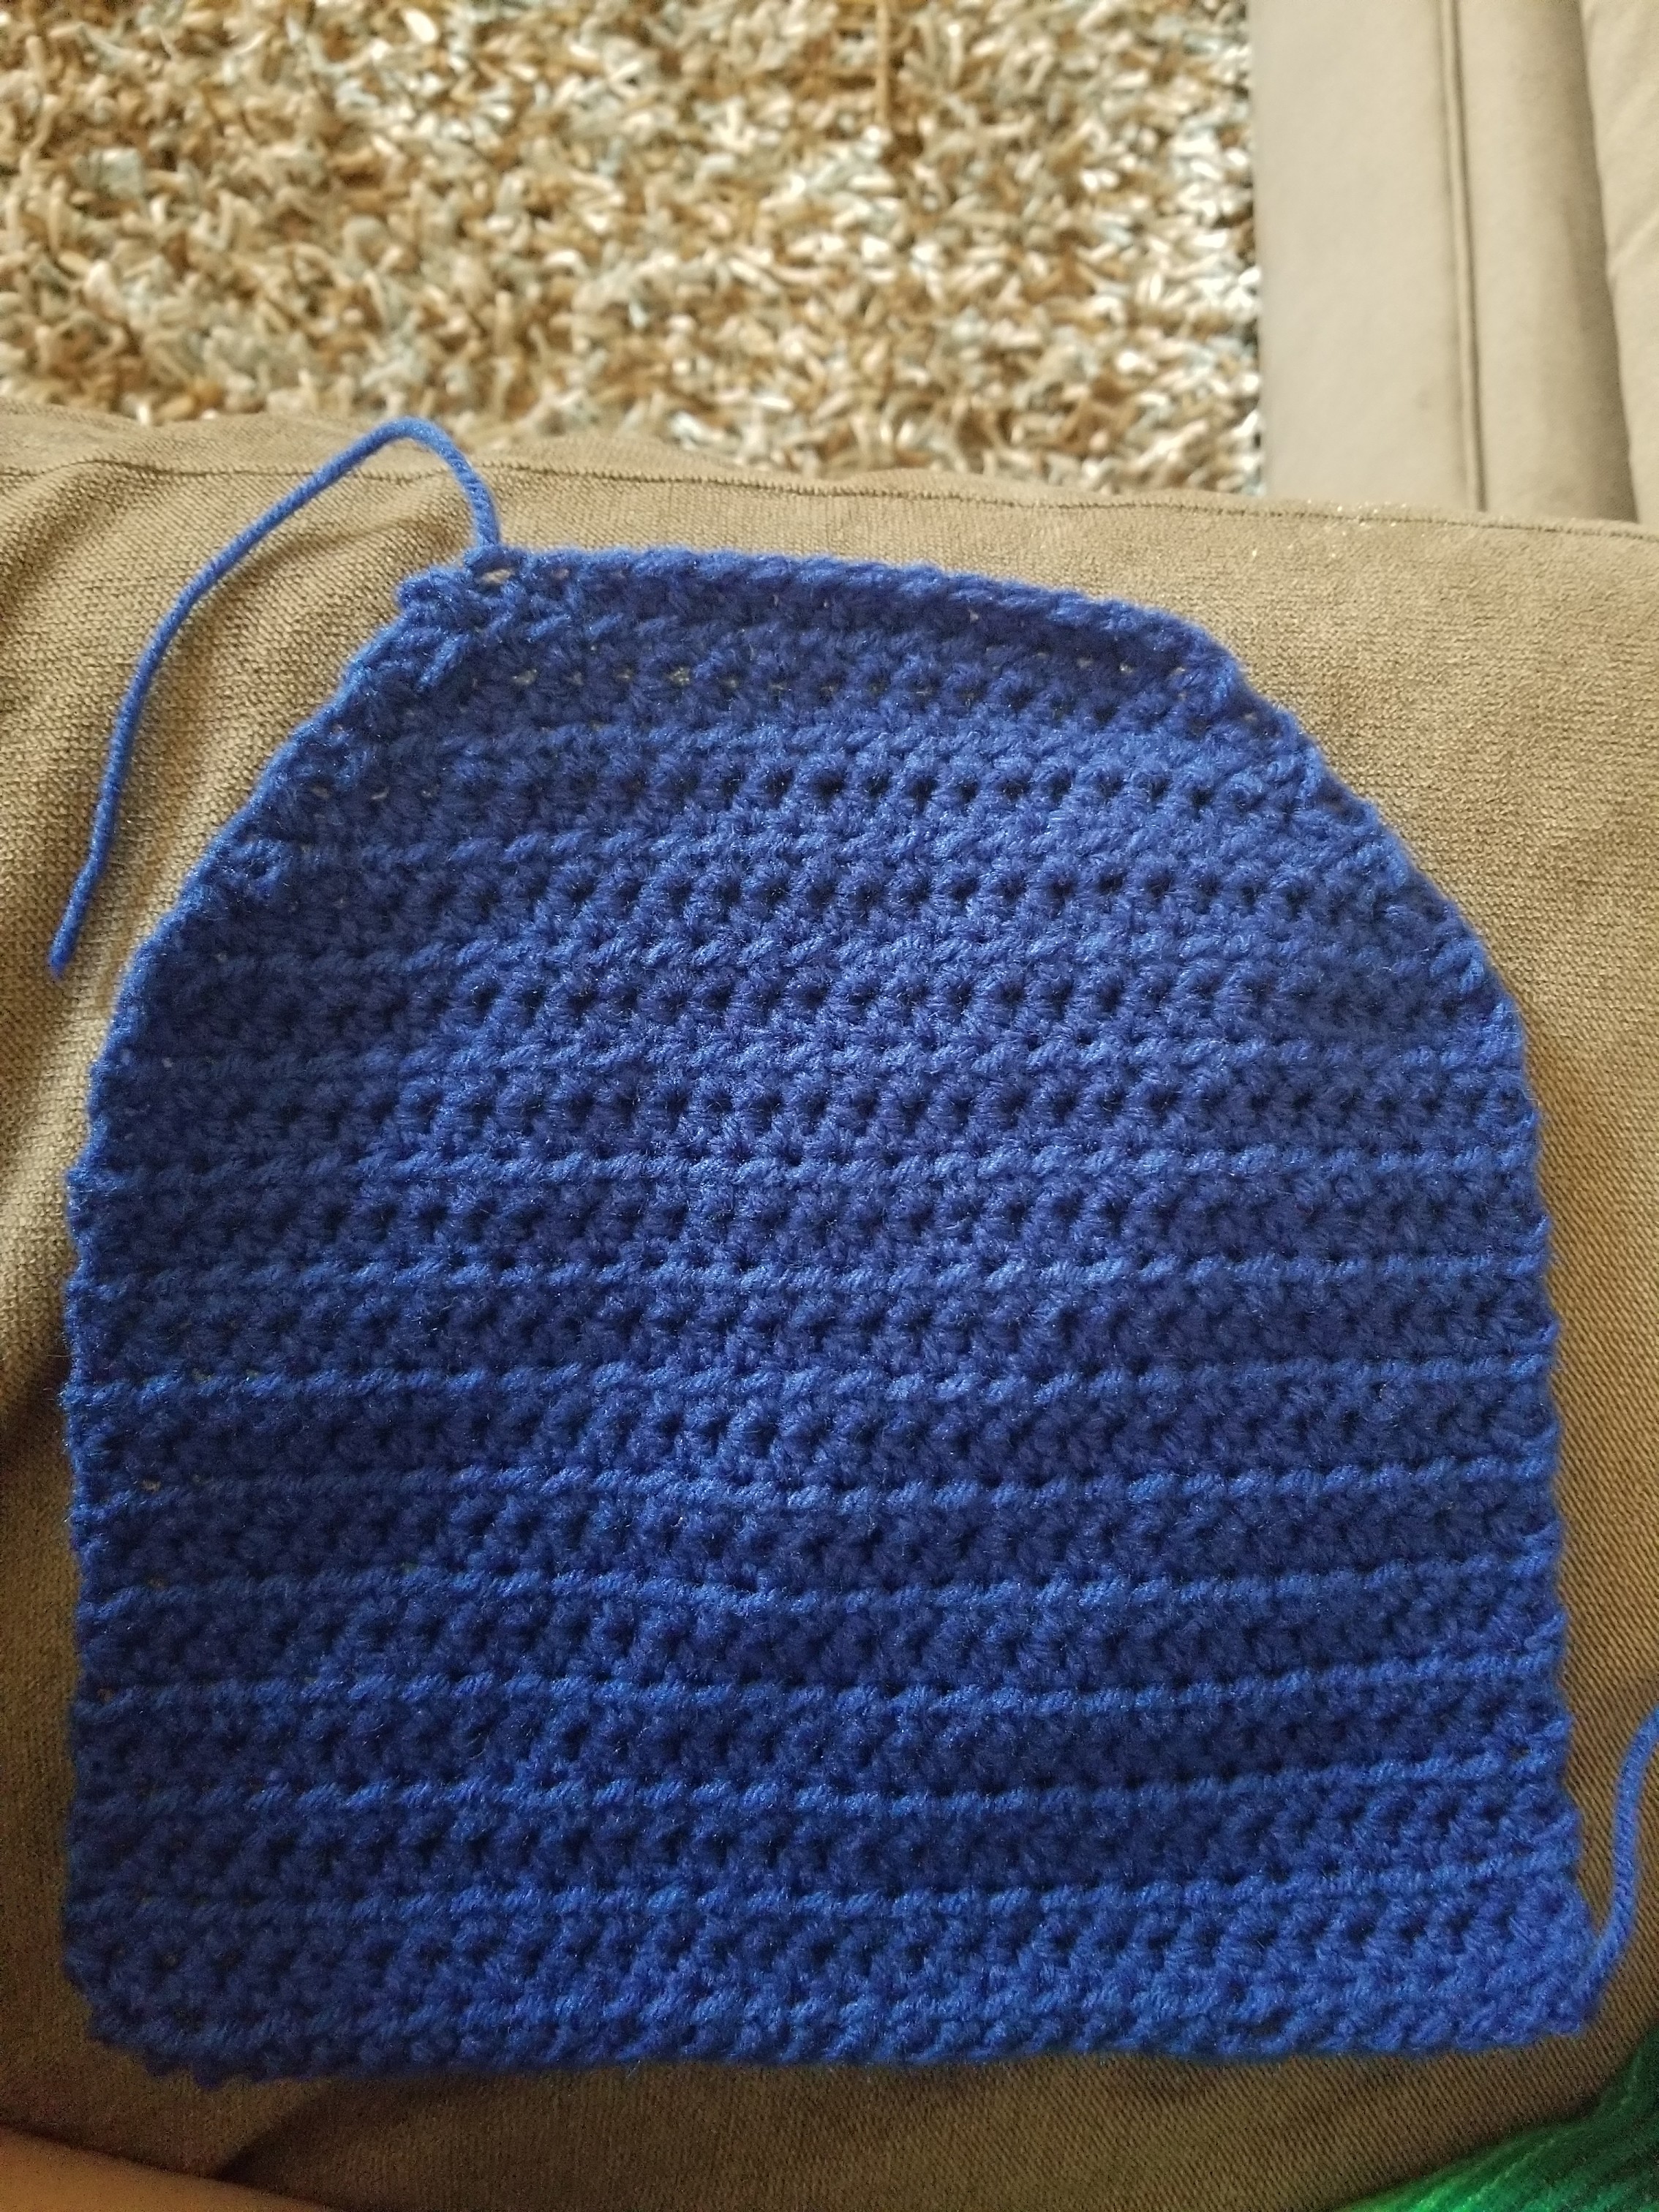
- Chain 30+1 (or however long you would like your pouch to be. I measured based on pens and pencils. The plus 1 is a chain for the upcoming half double crochet (HDC).
- HDC into the second stitch from the hook and all the way across. Chain 1, and continue in this pattern for 20 rows or you can switch colors to make a block type pattern
- After row 20, chain 1 and you are going to start to decrease. Decrease 1 at the beginning of the row, and decrease 1 stitch at the end of the row. So you will be decreasing 2 stitches on each row. I ended up with 14 stitches across on my final row.
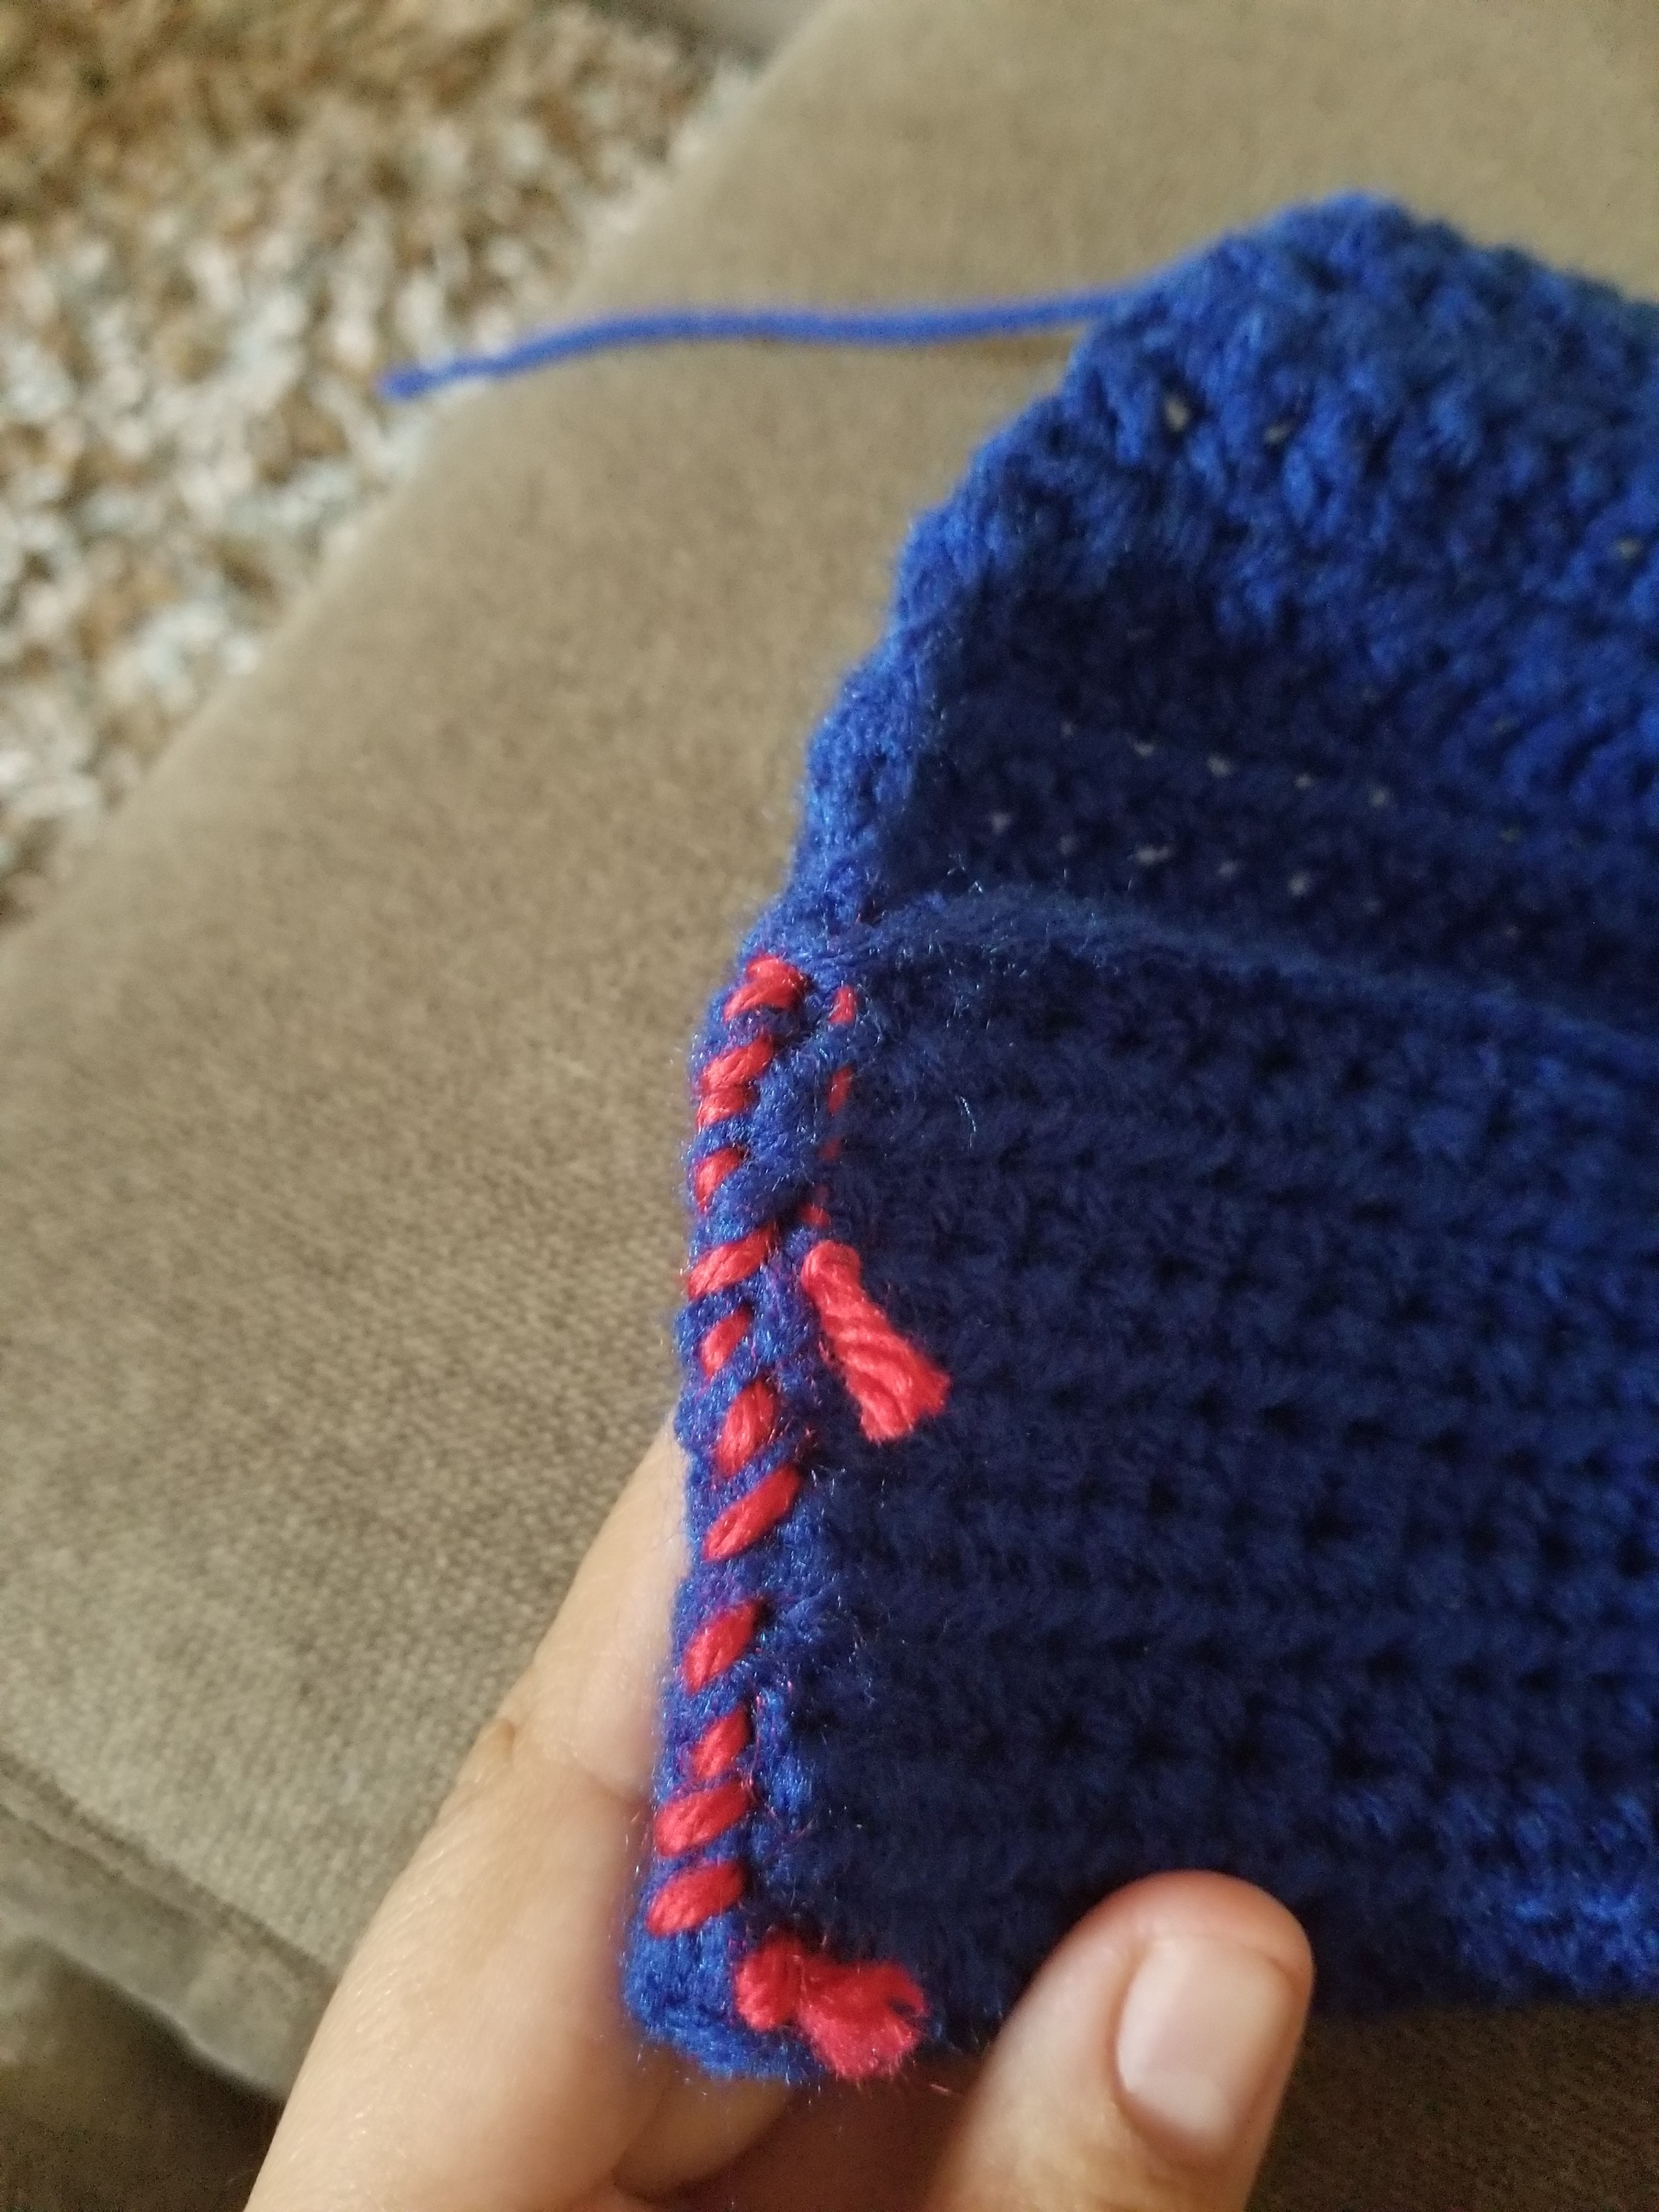
- Once you are done with the piece, I folded the bottom (be sure you are on the wrong side of the work) up to meet the last full row of 30 stitches (so right before you started to decrease. You can use a stitch to marker to keep your place, or I just threaded my beginning tail into where I wanted them to join.
- I then took a different color and sewed the sides together using a needle. It is important you are sewing on the wrong side of the work because you are going to flip this inside out.
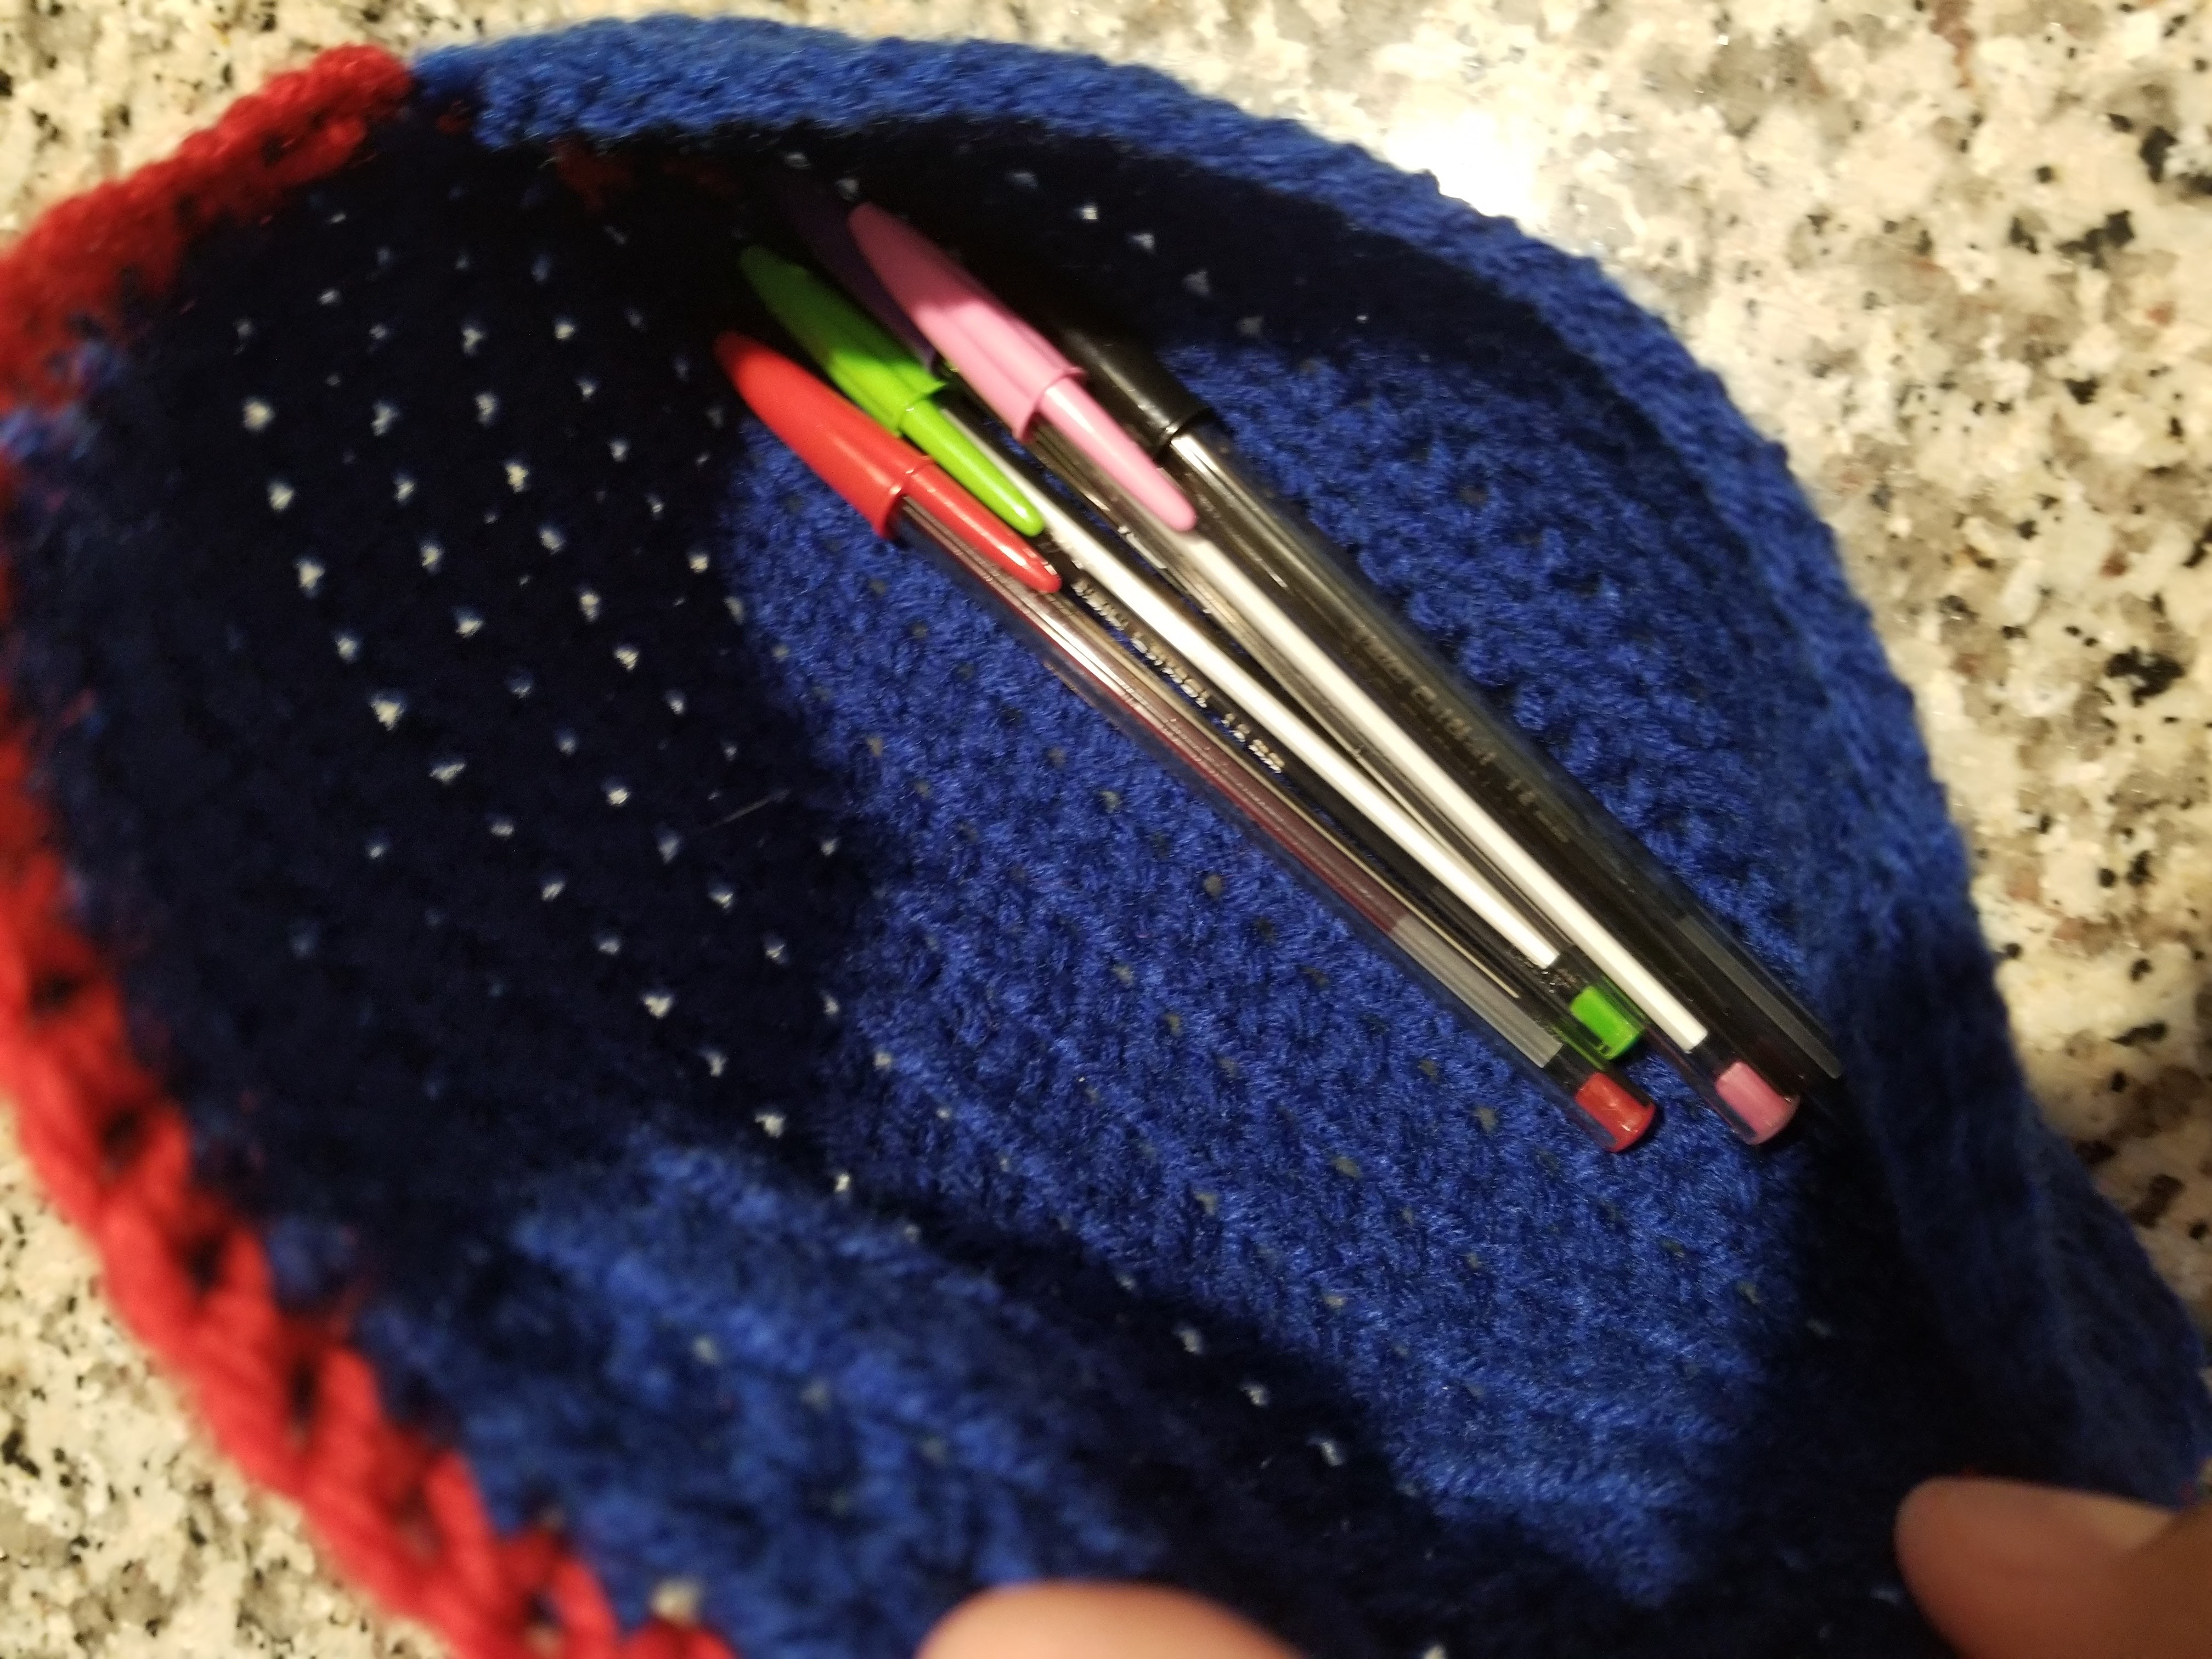
- Once I was done sewing, I then single crocheted around the top of the pouch in the same color that I sewed the sides with. You can then add a button of you choice to the middle of piece.
- Then, you are done!
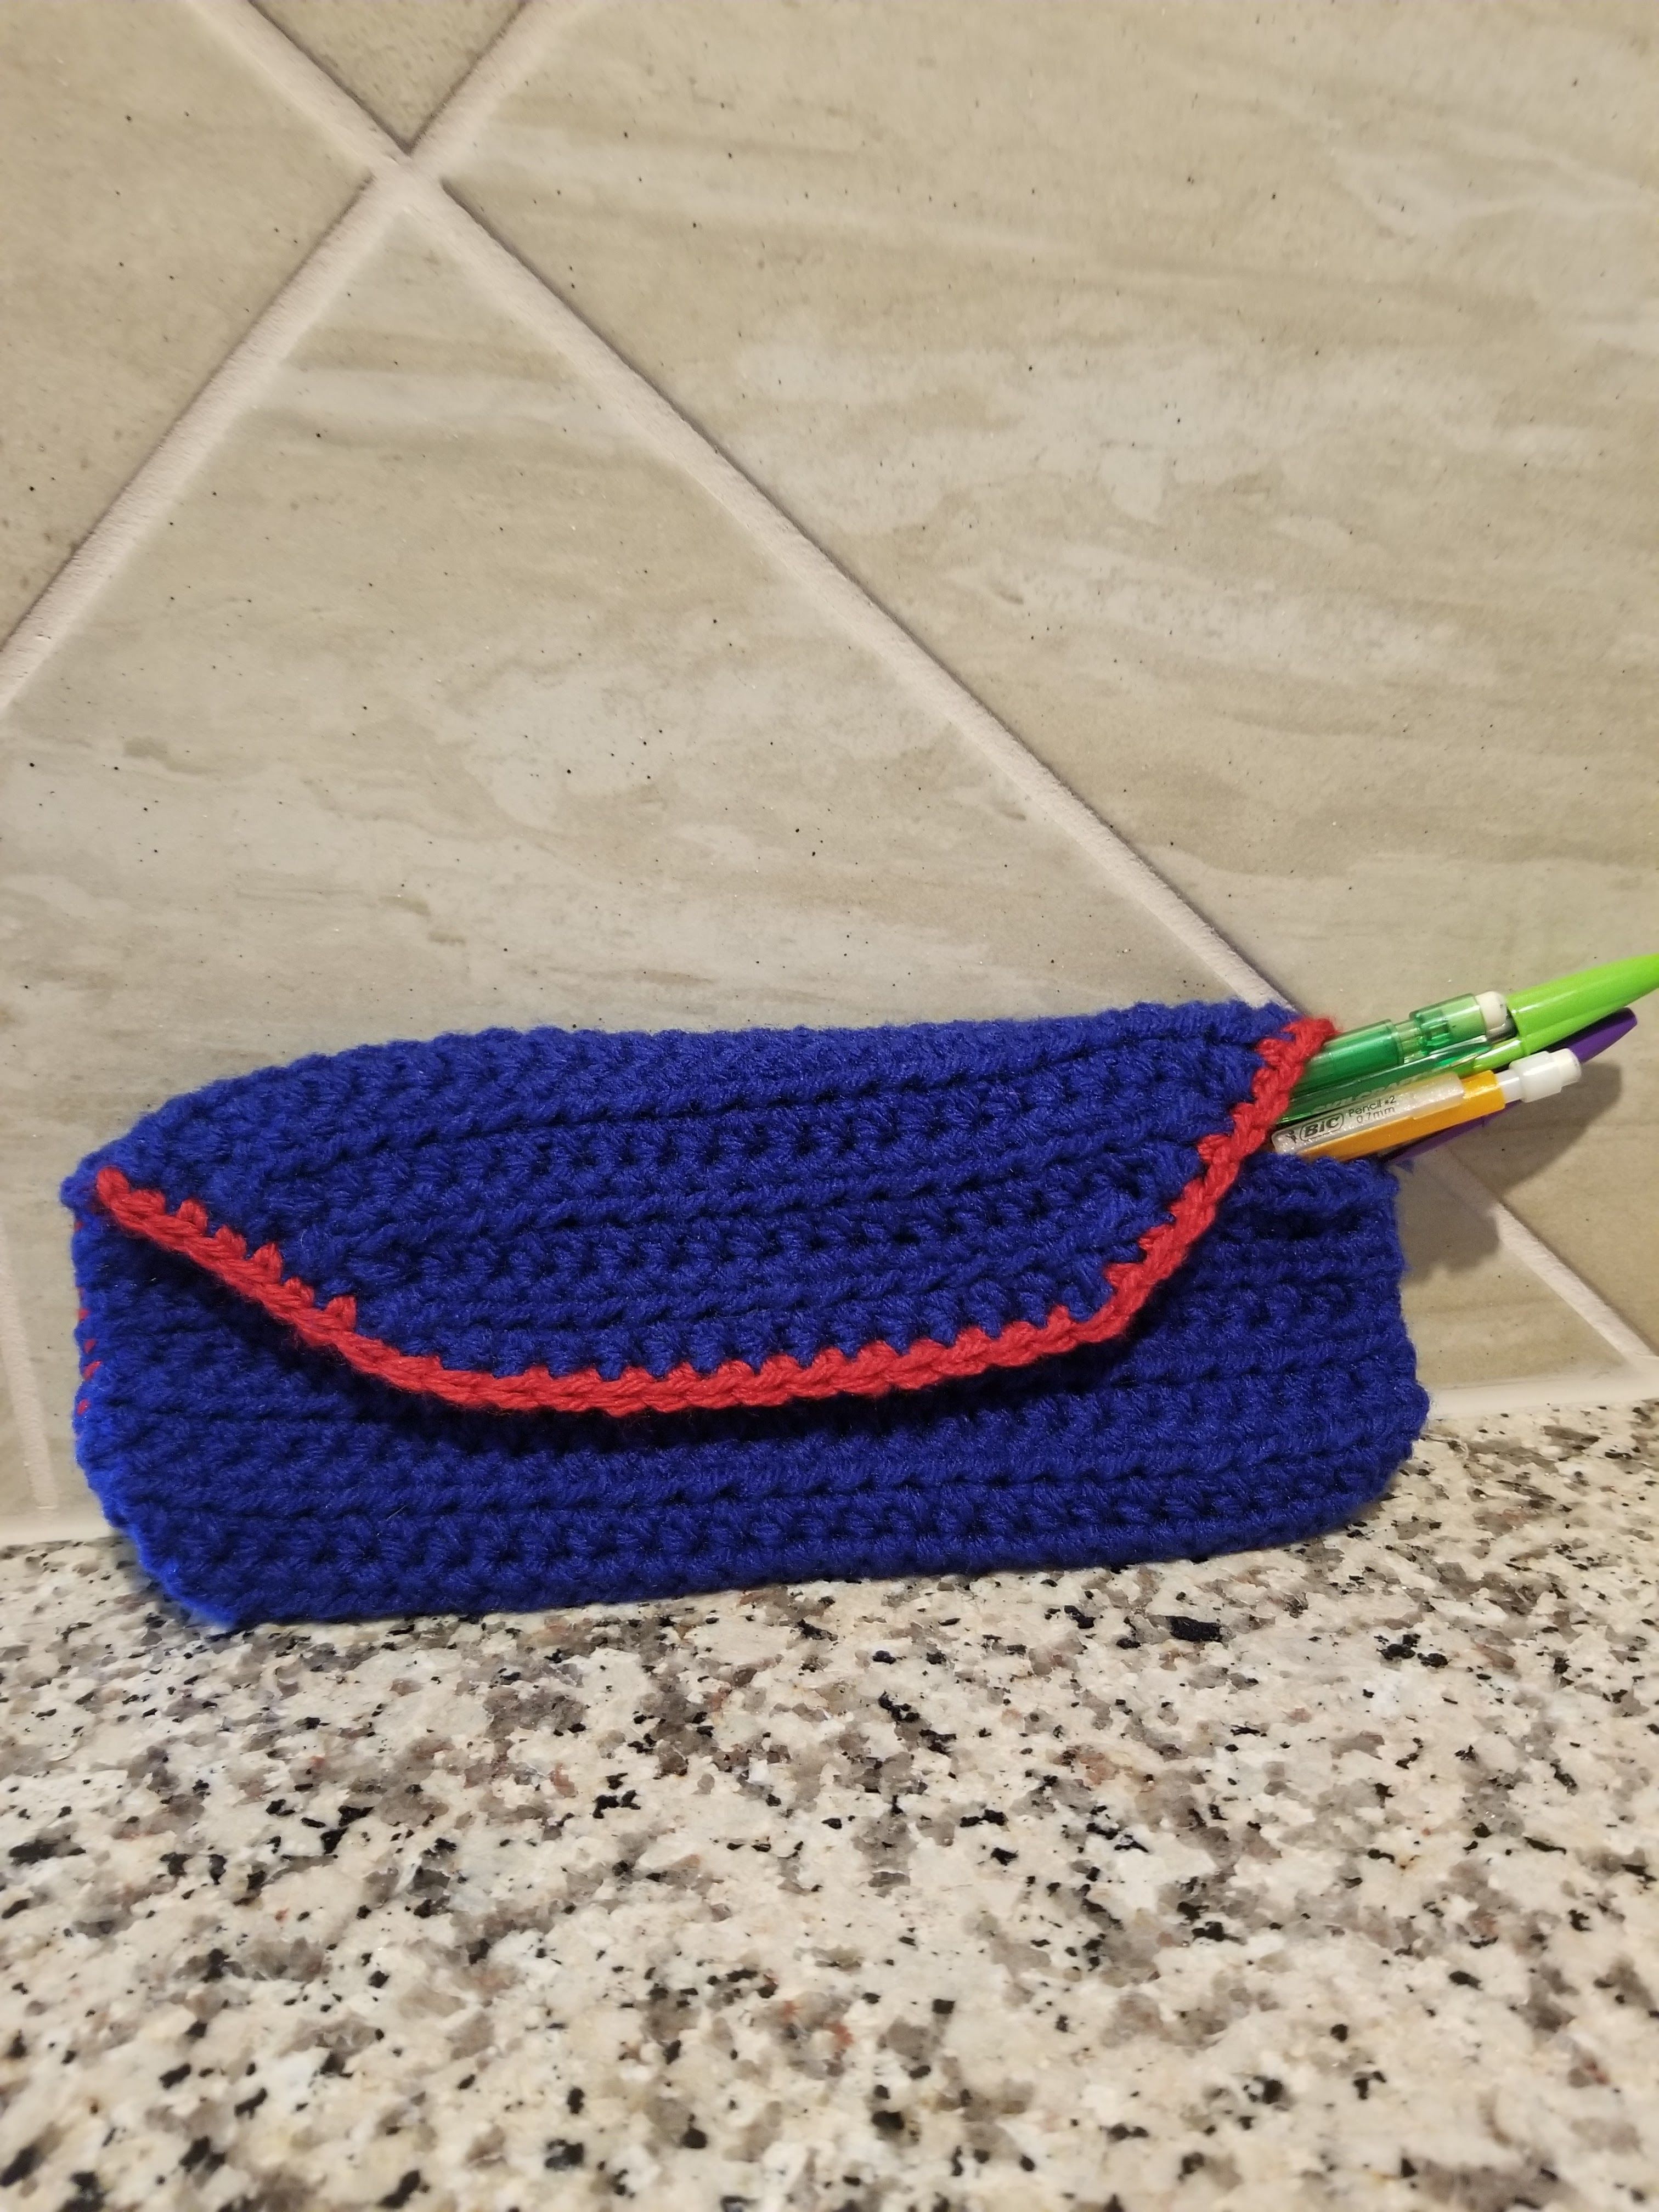
This is great pouch that can be customized in so many ways! So, make sure to get your creative juices flowing and start crocheting today!
Find Out More with MyMilitarySavings.com and DIY & Crafts!