I try to make the holidays as fun and magical for my kiddos as I can so I tend to go all out in terms of decorations. I won’t lie, my Christmas tree goes up the day after Halloween, I have flashing red lights for the windows for Valentine’s, I have leprechaun seat covers for our dining room for St. Patrick’s Day… You may call me crazy but my children think I’m awesome, so, can’t beat that! Easter though, I need to work on Easter. I have a few small trees that we decorate with doll-sized ornaments (that my cats happen to love so we are actually missing about half of said ornaments, ahem) but other than that the magic of the holiday doesn’t happen until the Easter bunny arrives!
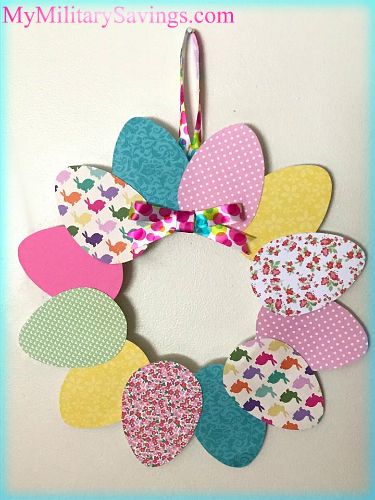
This year we wanted to change that. The first Easter craft on our list – an Easter egg wreath! I had a ton of spring appropriate scrapbooking paper from last year’s Easter craft (my oldest and I made DIY glass magnets – check those out here!) so this project came together in no time. This is all you need:
- Paper plate
- Scrapbook paper or card stock in designs of your choice
- Scissors
- Hot glue gun
- Ribbon
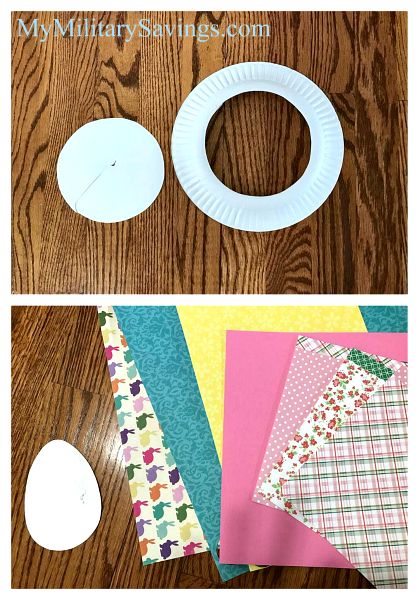
Step 1) Cut the center out of the paper plate and make an egg shaped template out of the paper circle that you removed. (See above photo.) Using your template, cut 12 different eggs from your decorative paper.
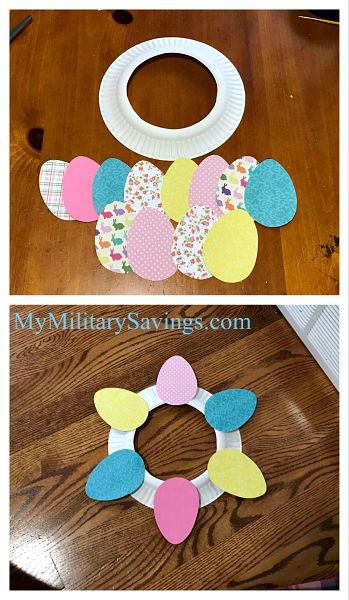
Step 2) Attach the first 6 eggs to your paper plate as shown in the above photo. You will create an illusion of depth and layering so we don’t want to just glue each egg side by side. After gluing the first 6 eggs down, then glue the remaining 6 eggs into the empty spaces as you can see in the photo below.

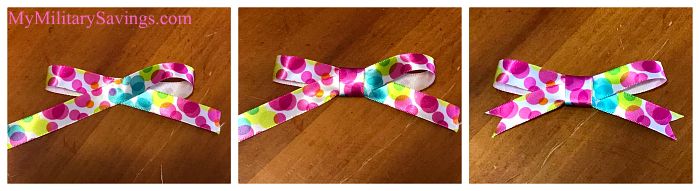
Step 3) The last step is to create a bow made from ribbon. I cut a piece about 15.5 inches long and a separate smaller piece 5 inches long. The first photo below demonstrates how I simply wrapped the ribbon around (and secured in place with a drop of hot glue right to the middle.) The middle photo shows how I wrapped that smaller piece of ribbon around the middle section to create a finished look, and the last photo shows how fancy dancy the bow looks by adding a little cut to the ends of each ribbon! Fold the end of the ribbon in half and make a little cut at an angle and voila!
Step 4) If desired, you can cut an additional piece of ribbon to create a loop for hanging. I cut my ribbon about 11 inches long and this was the perfect hanging length. Just hold the loop down at the back of the wreath with another drop of hot glue… woman’s best friend! (Man’s too? Maybe? I love that hot glue gun!)
Now put up and enjoy!
Happy happy Easter, y’all! This is the only time of year when it’s absolutely safe to put all your eggs into the same basket. Hehe <3
For more fun family crafts, visit MyMilitarySavings.com!